Installing IIS
The Jewel DMS Administration Console installs DMS as 3 windows services (DMS, Identity and Notification). The Administration Console can also configure IIS to function as a reverse proxy making communication to the windows services possible using DNS entries. IIS then forwards request made to the DNS names to the appropriate windows service.
Windows services
The windows services are installed by the DMS Administration console. They are bound to different ports on localhost:
- JewelDMS, bound to localhost: 5000
- JewelDMS Identity, bound to localhost: 6000
- JewelDMS Notifications, bound to localhost: 7000
- JewelDMS Content bound to localhost
IIS has a lot of sub features. Be sure to select all the correct ones as shown in the images below. If you do not use the exact same options as shown, you cannot start DMS correct, but there will be no warning message. The binding can be modified by supplying the '-server.urls' command line parameter.
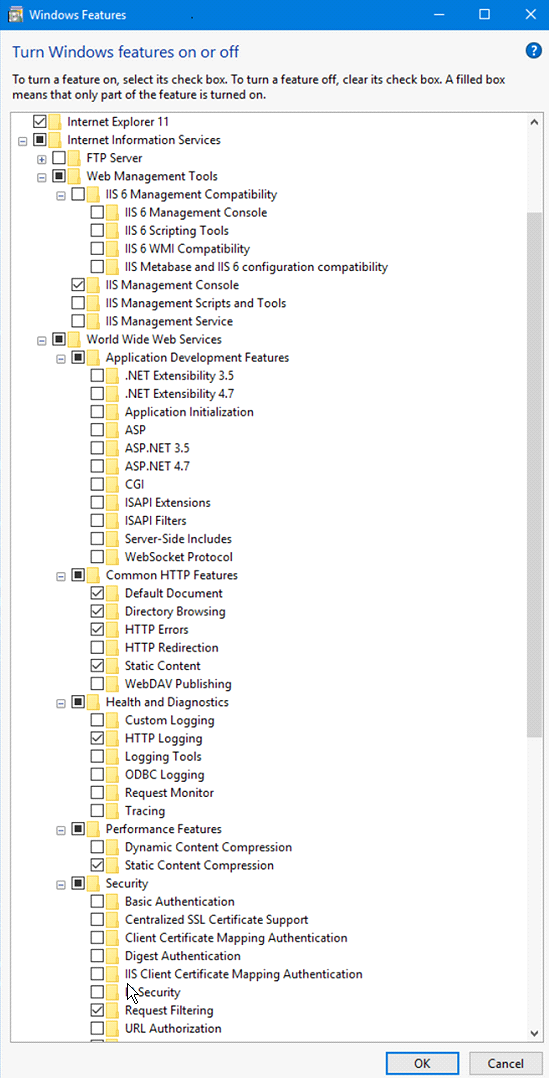
When installing IIS on Windows 10 or 11, choose the sub features as indicated in the image click to enlarge
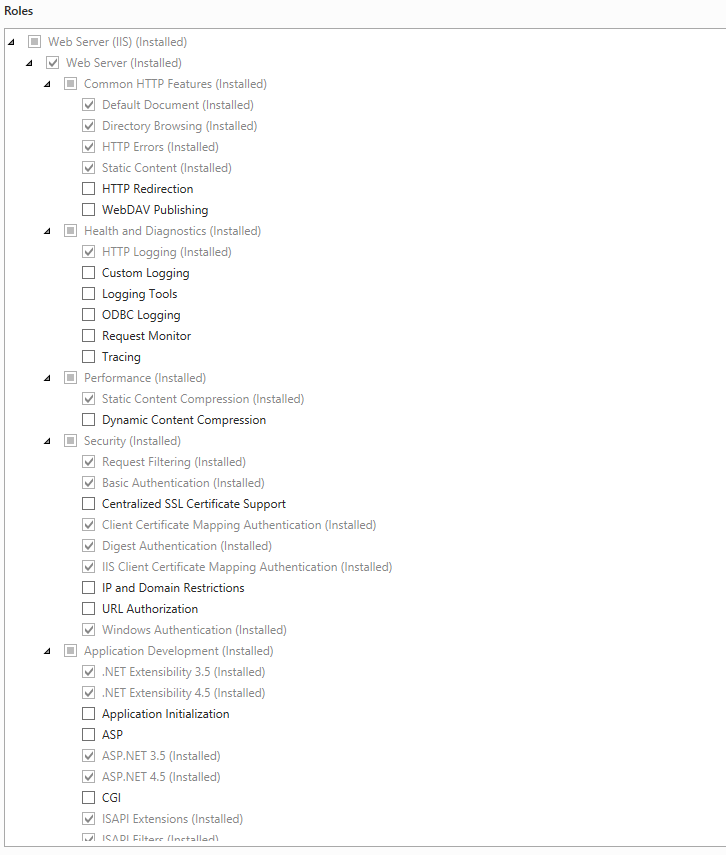
When installing IIS on a Windows 2012 server, choose the roles as indicated in the image. click to enlarge
To use IIS as a reverse proxy, an additional IIS module (Application Request Routing) needs to be installed. The module Application Request Routing (ARR) is available from the IIS platform installer or from the Microsoft website.
The windows services and the IIS Application Pool require a service account to run. For windows authentication it is required to run the application pool and the windows services under the same account.
DNS entries (CNAME) are required for DMS, Notification and Identity (e.g. dms.<mycompany>.com, notification.<mycompany>.com, and identity.<mycompany>.com).
Configuration
After installation of the Application Request Routing module this needs to be configured.
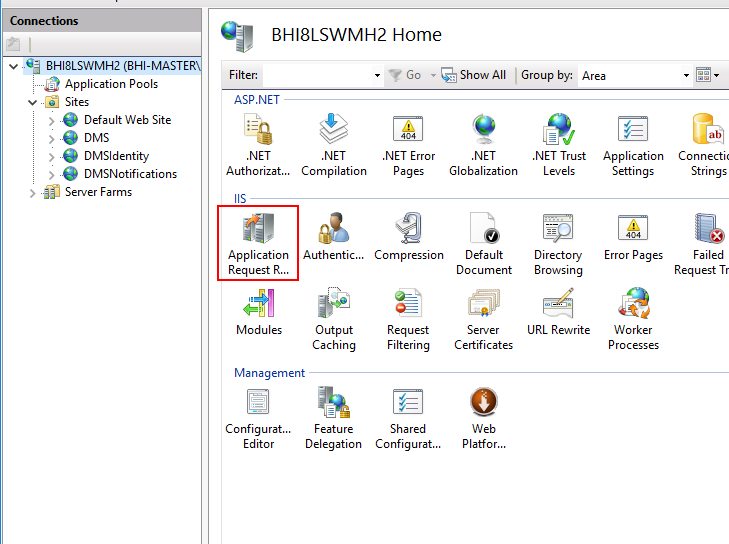
Open the feature and then select the ‘Server Proxy Settings’.
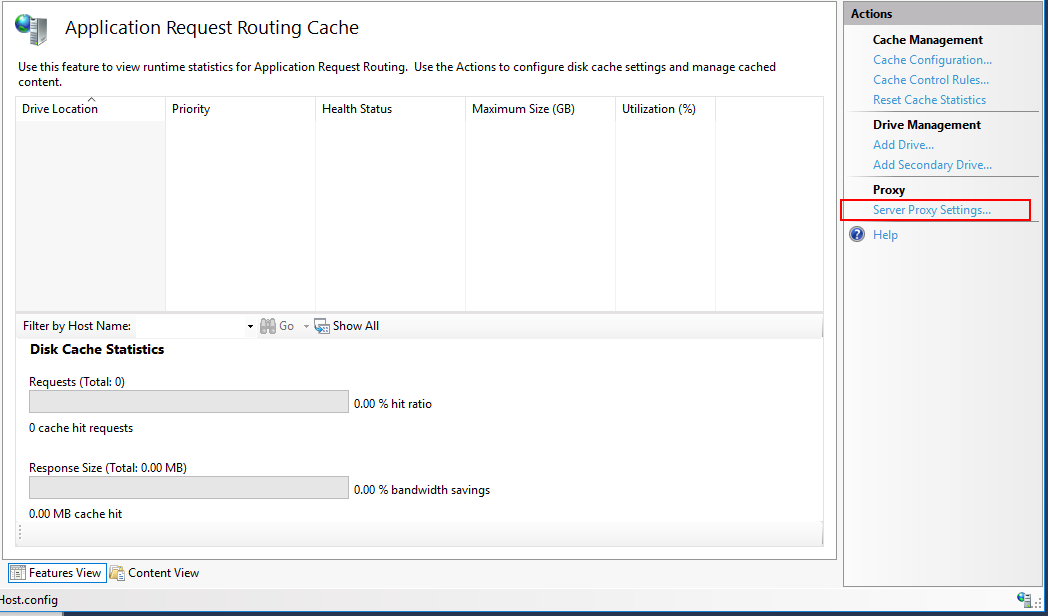
If not enabled, select ‘Enable proxy’. If not disabled, disable 'reverse rewrite host in response headers’ and click Apply.

DMS reverse proxy installation
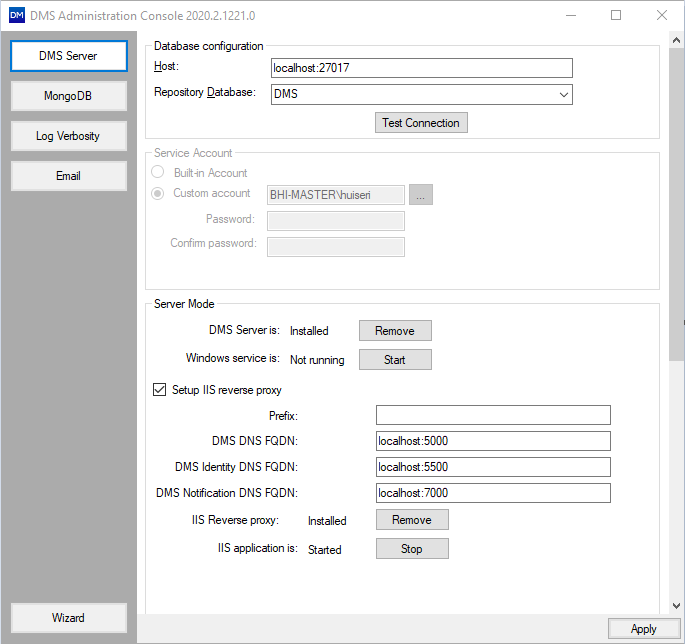
The reverse proxy will be installed automatically by the DMS Administration Console. The installation performs the following step:
- An application pool is created with name JewelDMS running under the same service account credentials that is used for installing the windows services.
- Three sites are created in IIS which act as a reverse proxy for the DMS service, DMS Identity service and the Notification service (DMS, DMSIdentity and DMSNofitications) respectively. These site will be bound to the given DNS entries (e.g. dms.baker.hughes, identity.baker.hughes, notification.baker.hughes). These can be configured with the “Setup IIS reverse proxy” option under the DMS Server menu:

- Each site has rules defined that forwards incoming requests to the right windows service and modify returned responses from the services before returning to the client.
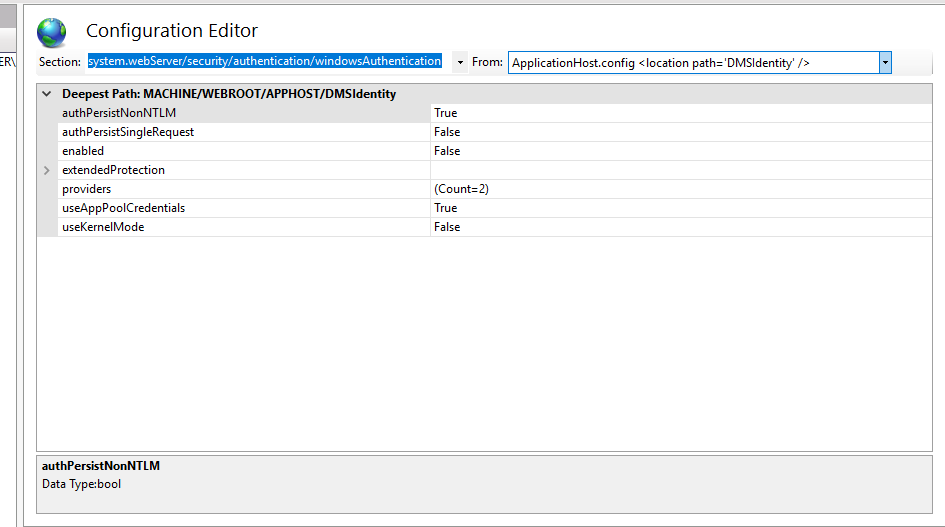
- The admin console configures the DMSIdentity site for windows authentication. For windows authentication to work in an IIS reverse proxy scenario it is important to set the following security settings in the DMSIdentity site. To verify, open the Configuration Editor of the DMSIdentitySite and select the section ‘system.webServer/security/authentication/windowsAuthentication’
- useAppPoolCredentials=True
- useKernelMode=False
Install HTTPS on IIS
Installation of certificates on IIS falls outside of the scope of this manual. The steps to follow can be found on the Microsoft website (How to Set Up SSL on IIS 7).
For installation on IIS, an SSL certificate must be used for each site.
Once a certificate is installed the binding to HTTPS can be configured by adding a binding to the site. To edit the bindings, select the site, right click and select ‘Edit Bindings’.
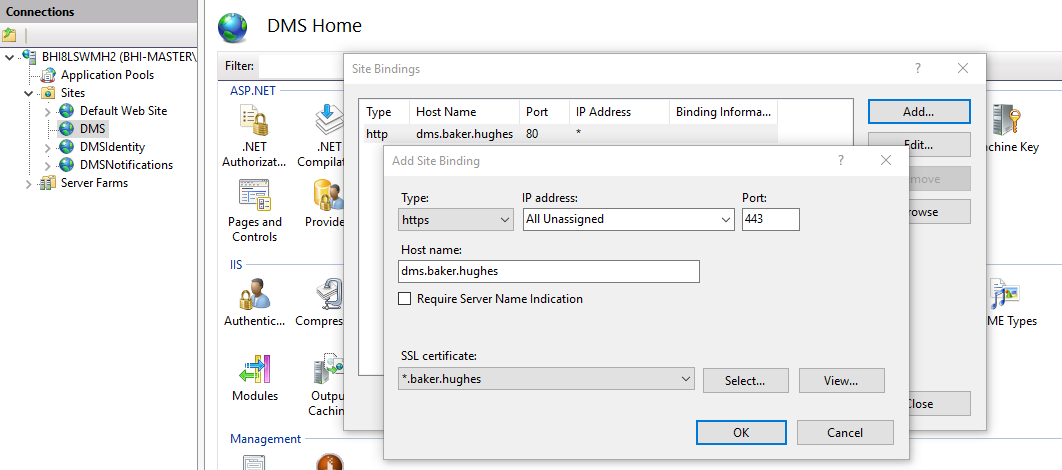
The above image shows an example where one certificate is used, indicated with the wildcard sign (*). When using separate certificates, something as the following should be entered: dms.<mycompany>.com, identity<mycompany>.com, notification<mycompany>.com respectively. click to enlarge
The rest of the setup of IIS is done by the administration console.
Troubleshooting
If the application pool JewelDMS fails to start. Perform the following steps in the IIS Manager.
- Right click on the JewelDMS application pool.
- Change the identity to the build in account ‘Network service’ and leave the dialog.
- Right click on the JewelDMS application pool and start the application pool.
- Change the identity to the same service account that was used for installing the services in the DMS Admin Console.