Using the Group View and filtering wells
You can open the Group View using the context menu option of the Wells (or well group) folder in the JewelExplorer, where you can perform filtering on your wells. Using this view, you can group wells and well designs. The combination of groups and filtering can be a great help in the organization of model data and reduce the time it takes you to find and visualize specific wells in your model.
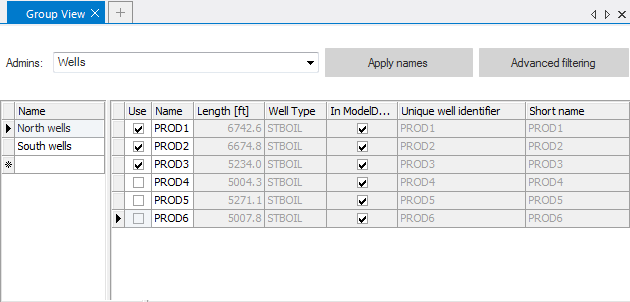
The Group view click to enlarge
Grouping objects
When opening the Group View from the Wells folder, all wells will be shown in a list. You can use the Admins drop-down list to select different data to be grouped. So, if you opened the Group View from the Wells admin but want to filter data for well designs, you can simply select well designs in the drop-down list.
Object data table and filtering
The center of the view is occupied by the list of objects for the active Admin object. The table is sortable like any traditional table. Clicking a column header will order the table by that column.
To create a Group, enter a name in the Name field of the left hand pane. As soon as you typed the name, the group is added to the Wells item in the JewelExplorer. Add a well to the group by toggling its ‘Use’ option in the right hand pane on. You can use the column sorting to easily select the required objects based on (in case of wells):
- Name
- Length
- Well Type
- In ModelData
- Unique well identifier
- Short name
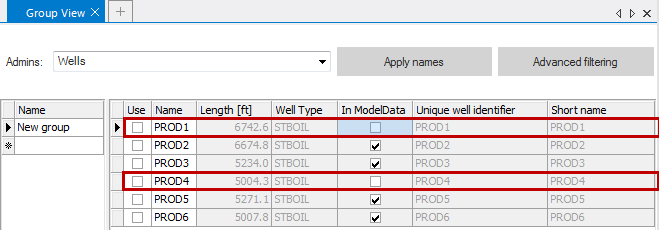
In the example below, some wells have unchecked checkboxes in the In ModelData column. If you want to create a group of these wells that are not in Model Data, you can sort on that column in the Group View and easily select the 'Use' checkboxes for the relevant wells.
click to enlarge
Besides these default well filtering options, more filtering options are available using the Advanced filtering button at the top of the view.
Advanced filtering
With the Advanced filtering options you can create new columns in which in which it will be indicated whether the objects do or do not answer to a specified criterion. Advanced filtering is not available for well designs
Advanced filtering click to enlarge
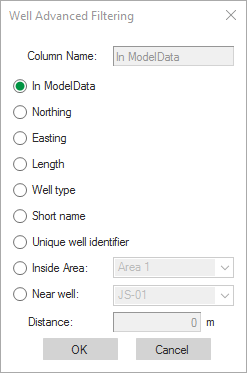
The Well Advanced filtering form appears when the you click the Advanced filtering button on the Group View. The image shows the advanced filtering menu for wells.
When using advanced filtering, a new column is added to the table in the Group View. In the column for each well is indicated whether it matches the criteria set for the filter or not, true or false. Sorting on the column enables you to easily select required wells.
The selection of filtering options is mutually exclusive; only one filtering option can be selected from the menu at a time. However, you can use multiple advanced filters by selecting one after the other from the menu.
In ModelData Add In ModelData as a filtering option.
Northing Select the well Northing coordinate as the filtering option.
Easting Select the well Easting coordinate as the filtering option.
TD Select the well Total Depth as the filtering option.
Well Type Select the Well type as the filtering option.
Short Name Select the Short Name as the filtering option.
Unique Well Identifier Select the Unique well identifier as the filtering option.
Inside Area Select an area as a filtering option. All wells can be filtered inside or outside the specified area.
Near well Select a well neighborhood as filtering option. All wells can be filtered inside or outside the specified well area (specified by a distance radius around the selected well).
Distance Specify the Distance radius as area around the selected well.
Example
Using the Inside Area filter click to enlarge
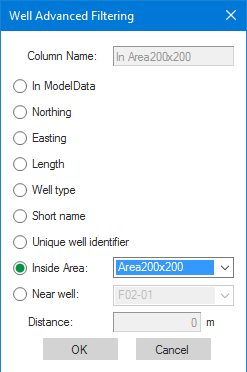
The following is an example of how the Inside Area filter can be used to display only the wells inside a certain Model Area. A second area has been defined that covers the lower left corner of the larger model area.
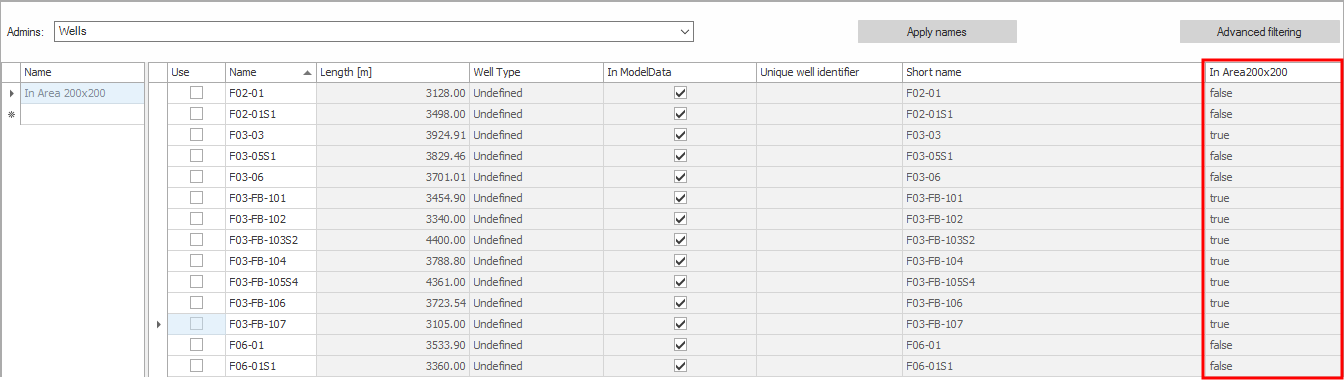
Click Advanced filtering in the Group view. Select Inside Area and then Area200x200 from the drop-down list. ‘Area200x200’ is the name of the small area in the image. Click OK, and a new column will appear in the Group View based on the advanced filtering option selected. In this example, the new column, ‘In Area 200x200’ is added to the end of the table.
New group appears click to enlarge
Now create a new well group with the name ‘In Area 200x200’ . When you sort the table by ‘In Area200x200’, you can easily select only the wells inside Area 200x200 and assign them to the new group.
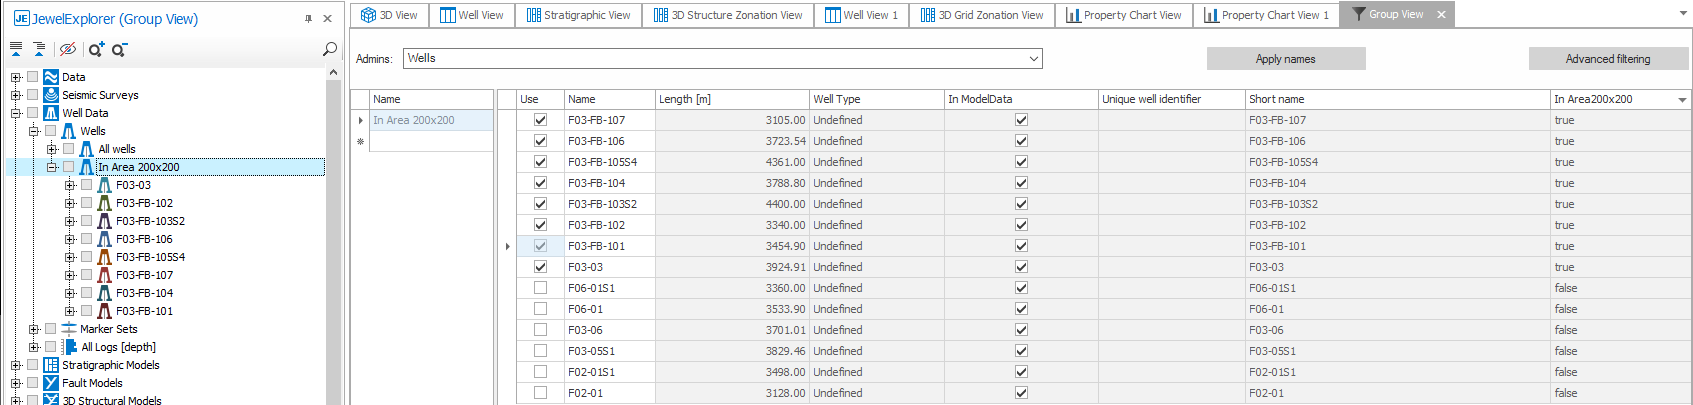
New group appears in the JewelExplorer click to enlarge
In the JewelExplorer, the new well group will appear and can be selected for display. In the 3D View, only the wells within Area 200x200 are shown.
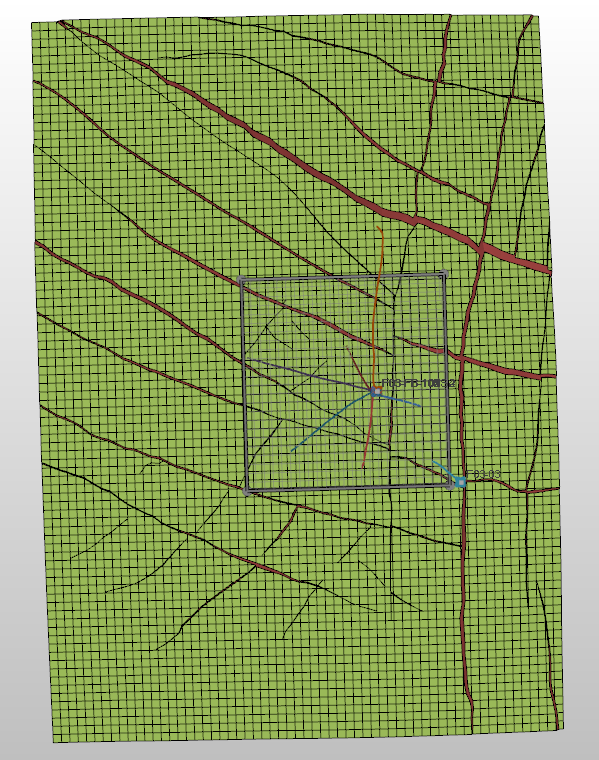
Only wells within Area 200x200 are shown click to enlarge
Managing groups from the Group View
To the left of the wells list is a small table where existing groups can be selected. New groups can be created from this table. To make a new group, if you have not previously made one using the context menu, simply click into the blank row in the left side of the view and type a group name. To make a group active in the view, click the name of the group. The black row indicator will appear to the left of the group name. This activates the group. Any objects that are already assigned to the group will have their box in the Use column checked. Checking the box in the Use column for an object will add it to the group. An example is shown below:
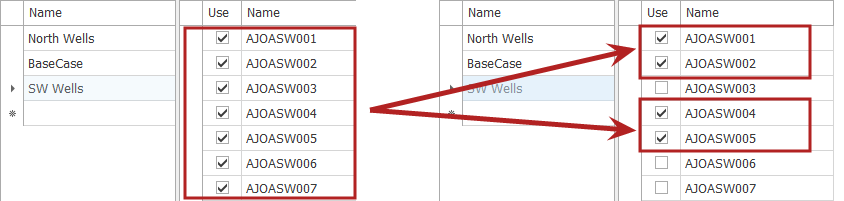
click to enlarge
In this example a new group, “Test Group” has been created and is active. In the first image, WBWell1, 2, 3, 4, and 5 are all active and included in the group. In the second image, only WBWell 2 and 4 are included in the group. These changes are also reflected in the JewelExplorer. After changing the composition of a group in the Group View, expand the group in the JewelExplorer and view the changes.
Visualization of the groups in the 3D View can also be controlled from the Group View. The column to the right of the group name,Active, is used to control the groups that are visible in the 3D View. Visualization isnot mutually exclusive; any combination of groups can be visualized from the Group view at the same time. The following set of images show the ability to visualize different groups simultaneously through the Group View.
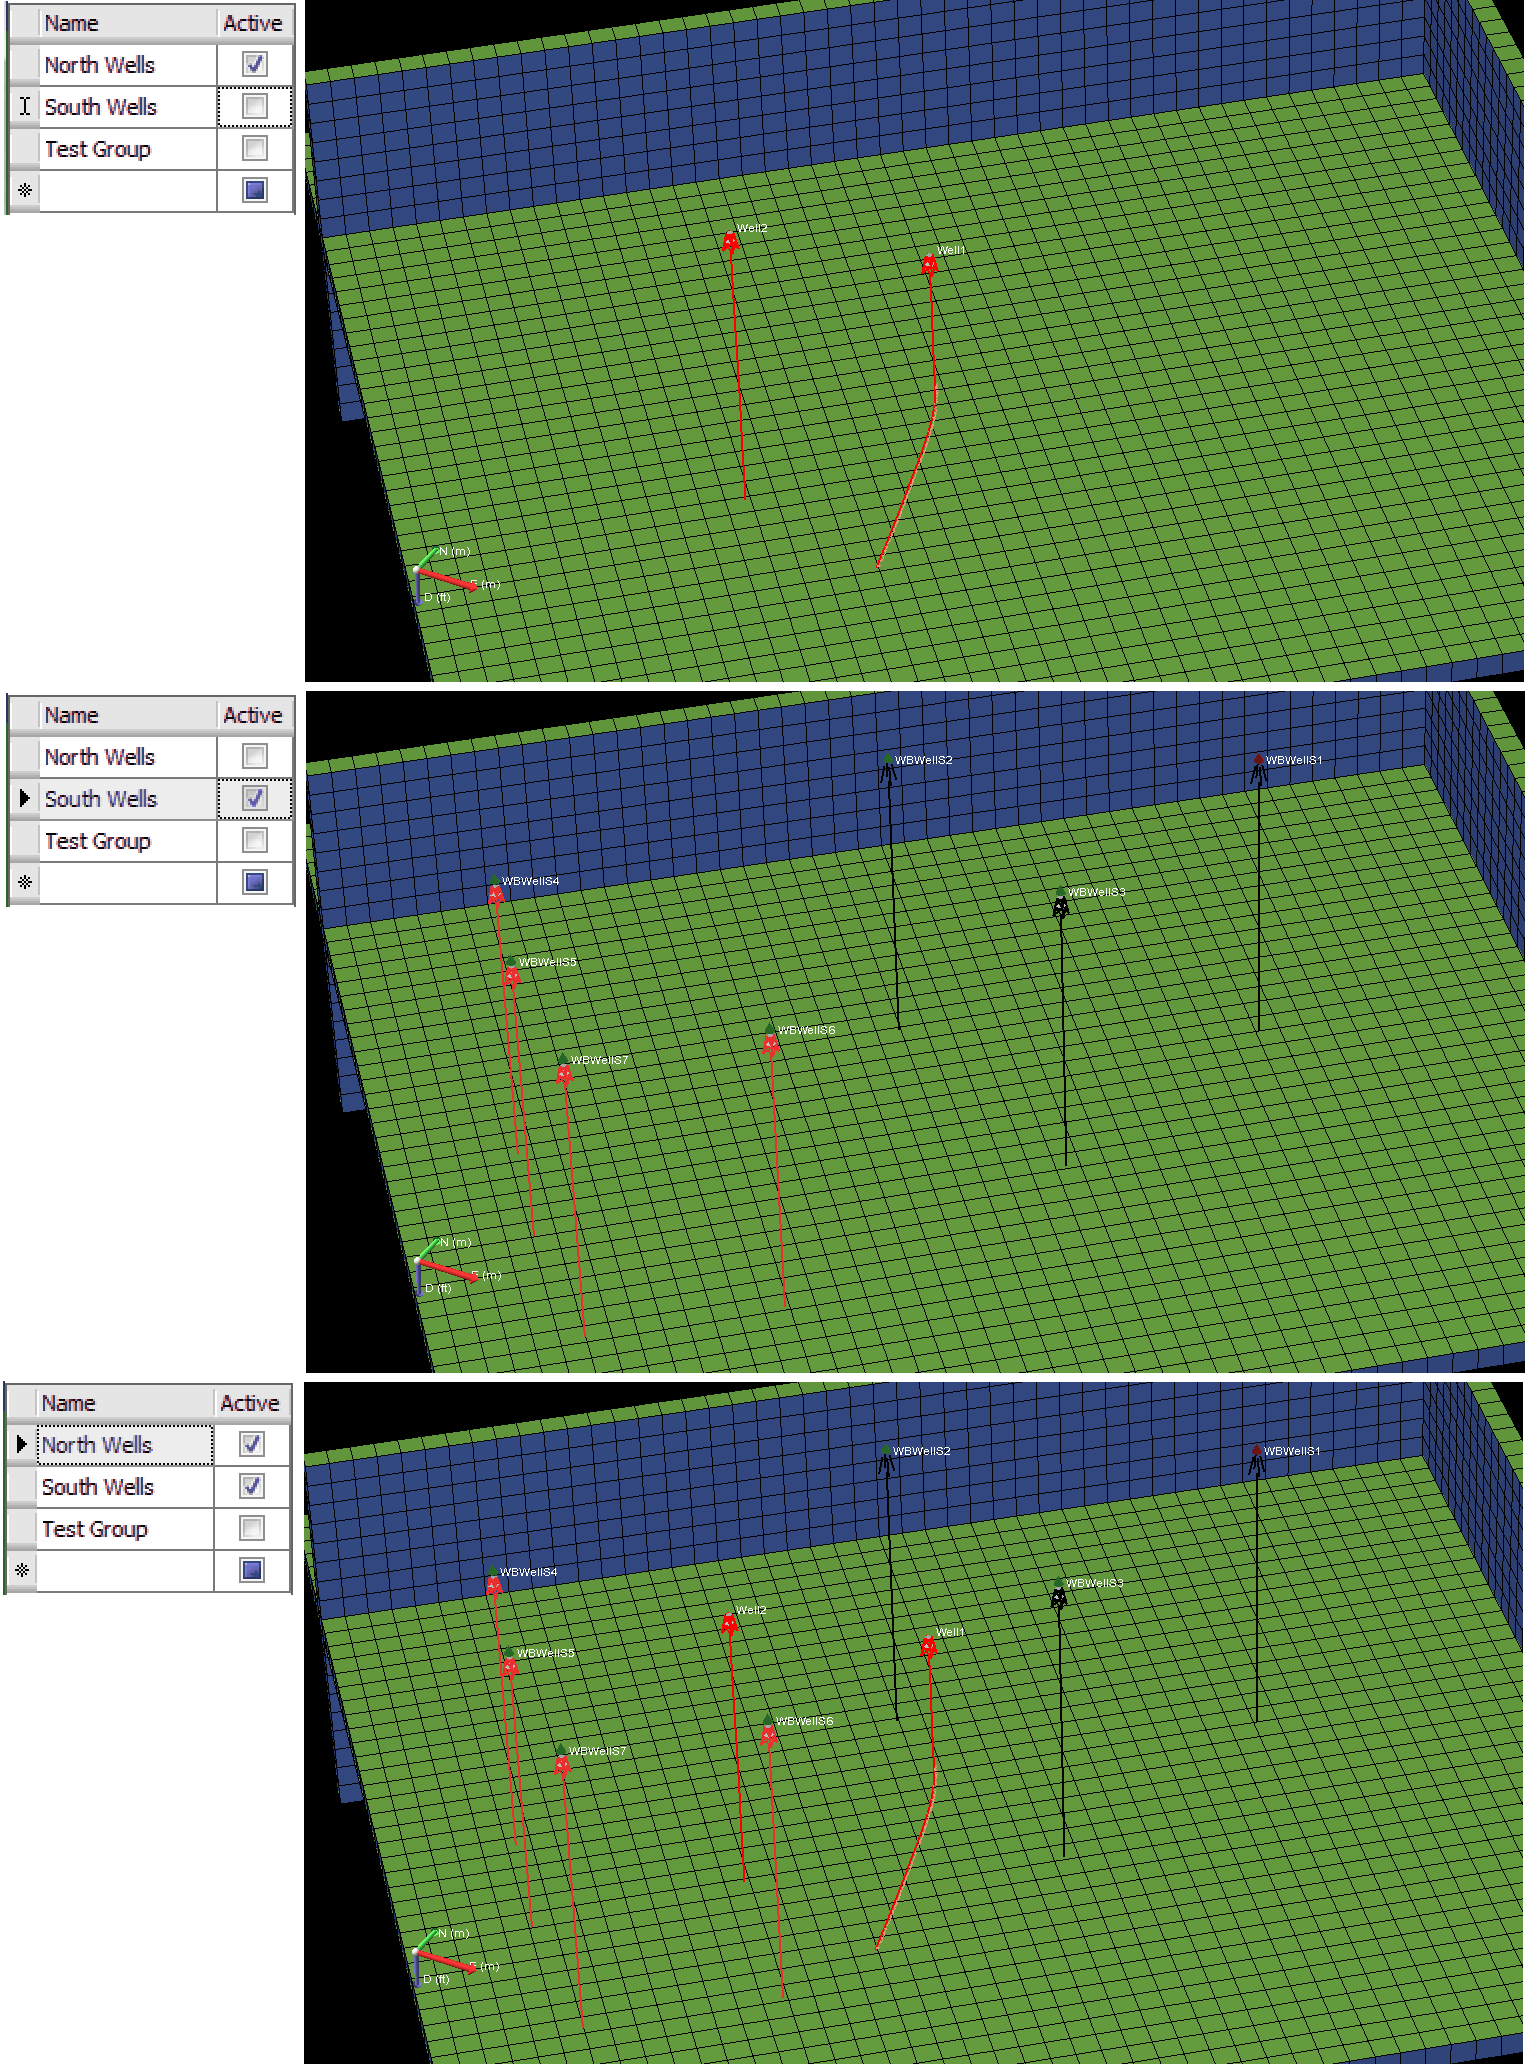
Displaying different groups at the same time click to enlarge