Configuring Entra ID
This document describes how to enable Microsoft Entra ID authentication for a JewelSuite Data Management Solution (DMS) deployment. It is intended for customer IT administrators and system operators responsible for configuring identity and access management in their environment.
The configuration consists of two main activities:
- Creating and configuring a Microsoft Entra ID application for JewelSuite DMS
- Configuring JewelSuite DMS to use Entra ID OpenID Connect (OIDC) authentication
Create a New Entra ID Application Registration
JewelSuite DMS requires a single Microsoft Entra ID application registration configured to support two authentication flows:
- Authorization Code flow with PKCE for interactive user authentication
- Client Credentials flow for service-to-service authentication between internal DMS components
Create the Application Registration
Create a new application registration in the Microsoft Entra admin center. Use a descriptive name such as 'JewelSuite DMS' and select the account types appropriate for your organization.
Platform selection
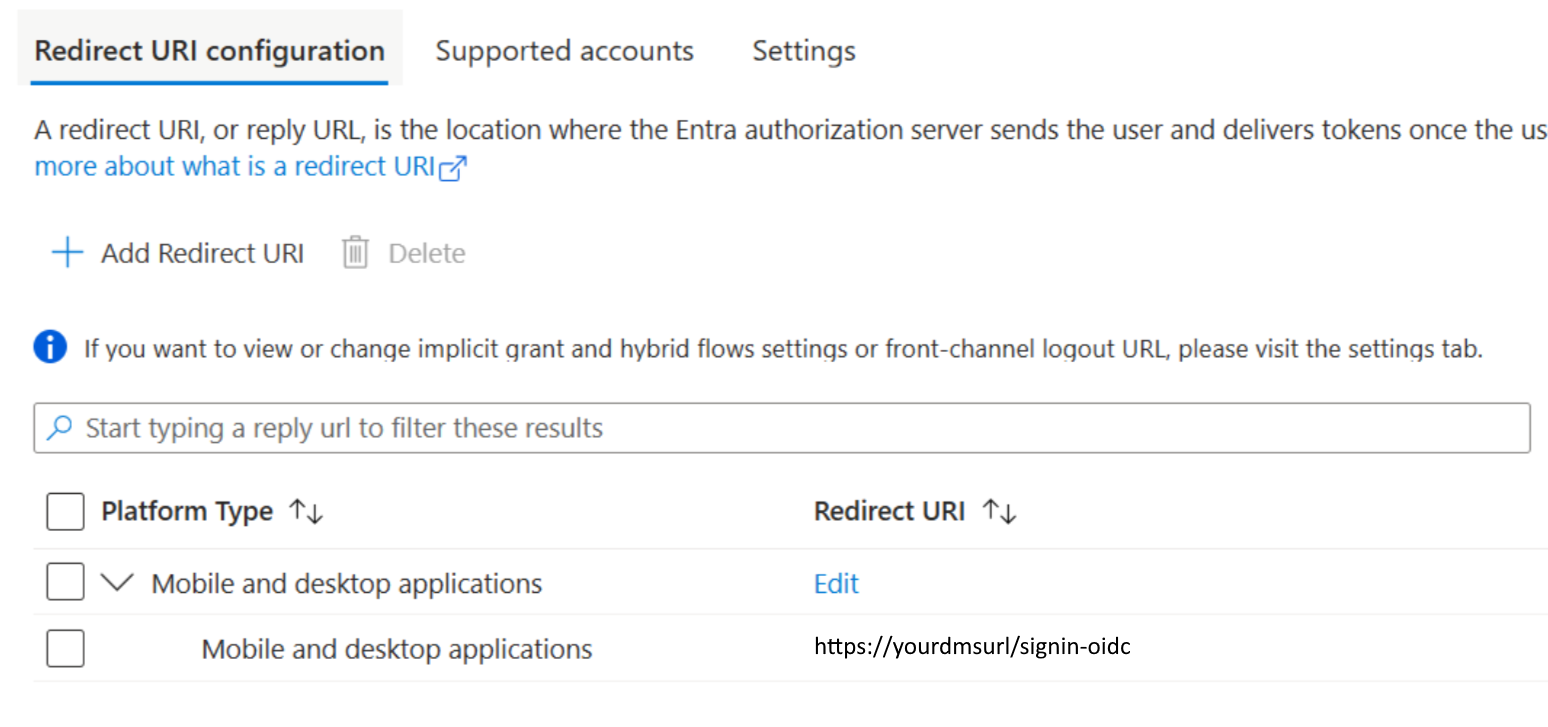
When configuring authentication for the Entra ID application, add a Mobile and desktop application platform. This is required because JewelSuite DMS uses the OAuth 2.0 Authorization Code flow with PKCE for interactive user authentication. The Mobile and desktop application platform enables this flow and treats the JewelSuite client as a public client, which is the appropriate security model for user sign in.
Authentication and Redirect URIs
Configure the following redirect URIs under the Authentication settings. These values must match the JewelSuite DMS configuration exactly:
- Sign-in redirect URI: https://<your-dms-url>/signin-oidc
- Sign-out redirect URI: https://<your-dms-url>/signout-oidc
Client Secret Configuration
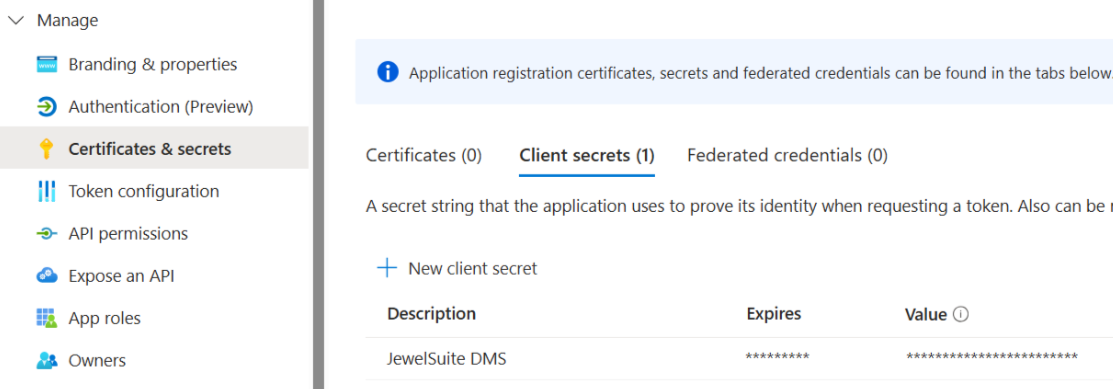
Create a client secret under Certificates & secrets. This secret is required for the OAuth 2.0 client credentials flow used by the DMS Notification Server. Store the secret securely and ensure it is available during the DMS configuration step.
Token Claims
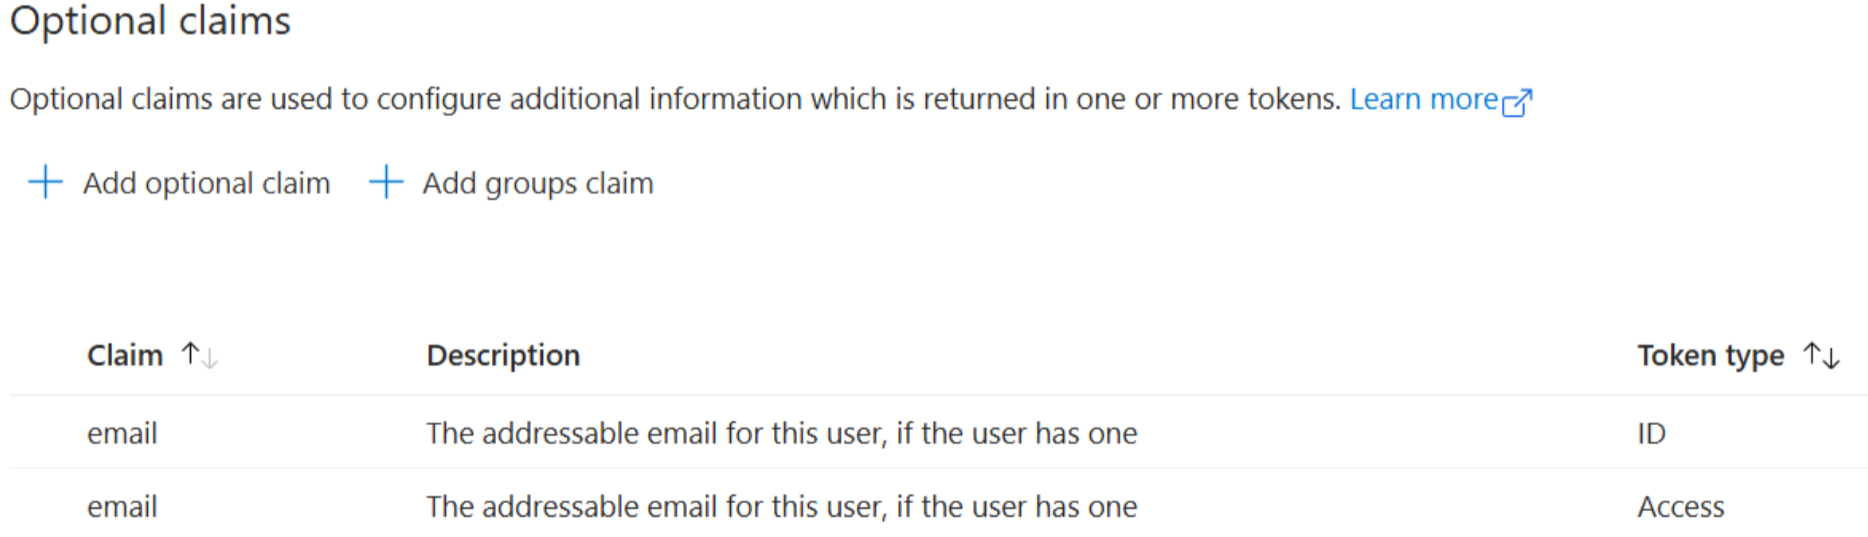
Under Token configuration, add the following optional claims:
- email – Token type: ID
- email – Token type: Access
Configure Permissions (Scopes)
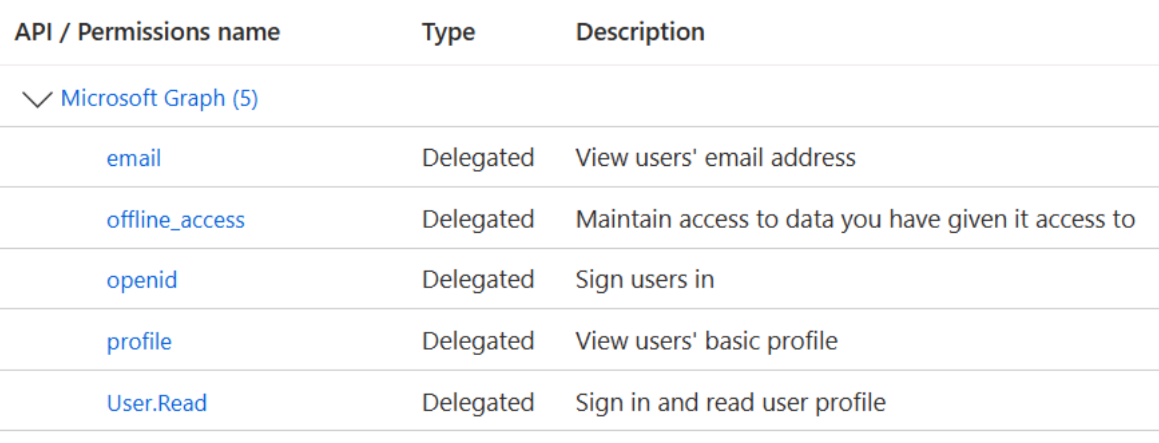
Navigate to permissions and ensure that the required OpenID Connect scopes are available, including:
- openid
- profile
- offline_access
Authorization Using Entra ID Groups
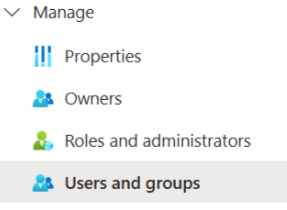
Create an Entra ID security group to manage access to JewelSuite DMS. Add authorized users to this group and use group membership within JewelSuite DMS to control application access.
Add an Active Directory Group for Authorization
Using Entra ID Groups in DMS
All groups that you want to be available in DMS to be used for folder security assignment should also be assigned to the Entra ID application.
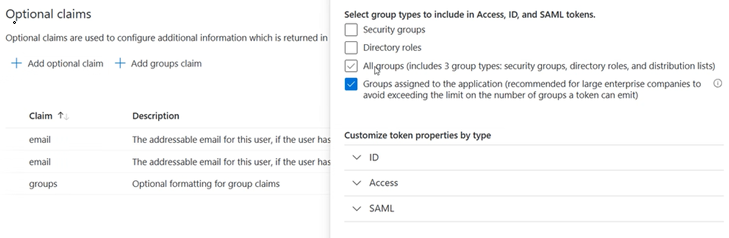
Also the groups claim needs to be added to the claims preferred with the option 'Groups assigned to the application' to not have issues with performance and the token size.
Enforcing v2.0 Tokens
Default Entra ID is configured to return v1 tokens even if you use the v2 token endpoint. This is configured for backwards compatibility. JewelSuite DMS needs v2 tokens since v1 tokens are returned with an incorrect issuer and this will not be properly validated.
To change this, open the application manifest file in Entra ID and change/add this property:
"accessTokenAcceptedVersion": 2,Configure JewelSuite Data Management Solution with Entra ID
After completing the Entra ID application configuration, update the JewelSuite DMS appsettings.json file on the DMS server to enable OpenID Connect authentication.
Required Information
Before proceeding, ensure the following values are available:
- Tenant ID
- Client ID (Application ID)
- Client Secret
- Sign-in redirect URI
- Sign-out redirect URI
OIDC Authentication Configuration
How to fill it into appsettings.json:
- Remove whole section IdentityServer section from appsettings.json
- Create new section OidcAuthentication
"OidcAuthentication": {
  "Audience": "<client-id-guid>",
  "Authority": "https://login.microsoftonline.com/<tenant-id-guid>/v2.0",
  "AutoAuthorizeOnAuthentication": true,
  "ClaimToUserName": "{0}",
  "ClaimType": "http://schemas.xmlsoap.org/ws/2005/05/identity/claims/emailaddress",
  "GroupsClaimType": "groups",
  "ClientId": "<client-id-guid>",
  "PrincipalCaching": true,
  "RedirectUri": "https://<your-dms-url>/signin-oidc",
  "PostLogoutRedirectUri": "https://<your-dms-url>/signout-oidc",
  "RequireHttpsMetadata": true,
  "Scope": "openid profile email offline_access <client-id-guid>/.default"
}
Change Section Swagger
Modify the Swagger section to enable OAuth authentication:
"Swagger": {
  "Enabled": true,
  "PublicAuthority": "",
  "AuthorizationUrl": "https://login.microsoftonline.com/<tenant-id-guid>/oauth2/v2.0/authorize",
  "TokenUrl": "https://login.microsoftonline.com/<tenant-id-guid>/oauth2/v2.0/token",
  "OAuthClientId": "<client-id-guid>",
  "Scope": "openid profile email offline_access <client-id-guid> default"
},
Change Section NotificationServer
Extend the NotificationServer section by adding the authentication settings shown below:
"NotificationServer": {
  "InstanceName": "JewelDMSNotification",
  "InstanceDisplayName": "JewelDMSNotification",
  "Urls": ["http://localhost:7000"],
  "BaseUrl": "http://localhost:7000",
  "InternalAddress": "http://localhost:7000",
  "Hub": "/NotificationHub",
  "HubV2": "/NotificationHubV2",
  "KeepAliveInterval": 15,
  "HandshakeTimeout": 15,
  "Authority": "https://login.microsoftonline.com/<tenant-id-guid>/v2.0",
  "ClientId": "<client-id-guid>",
  "ClientSecret": "<client secret>",
  "Scope": "<client-id-guid>/.default"
},