Creating a volumetric case
The first step of the Volume Reporting workflow (model > Volumetrics > Create Case) enables you to create a new volumetric case, or activate an existing one to review or modify it.
Toolbar on the Create Case form
You can copy, rename, or delete your existing cases via the toolbar on this form.

|
Copies the currently selected case in the drop-down list (i.e. the active case). |

|
Opens the Rename dialog, where a new name can be given to the active case. |
|
|
Deletes the active case. |
To create a new volumetric case
- On the Create Case form, select
 Create new from the Case drop-down list.
 - Type in a name in the adjacent field.
- Click Apply to create the case and keep the form open, or click OK to create the case and proceed to the Assign Data step.
Once you have gone through the complete Volume Reporting workflow, your volumetric case folder will be available in the JewelExplorer, (3D Grids > Your 3D Grid > Properties > Your Volumetrics Case).
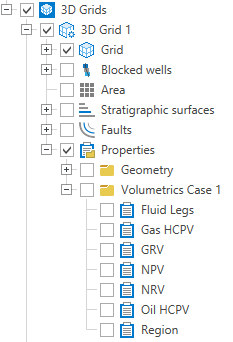
Once you complete the workflow, your volumetric case folder will be available in the JewelExplorer. click to enlarge
To activate an existing volumetric case
You can set an existing case as default, so that it is automatically selected when you open any of the forms of the workflow.
- On the Create Case form, select the case of interest from Case the drop-down list.
- Click Apply to activate the case and keep the form open, or click OK to activate the case and proceed to the Assign Data step.