Entering data in tables
You enter the bulk of your input data in the input tables inside the various views that are opened from either the workflow form or the Case Explorer. Generally, a view will contain multiple tables that you can access via the tabs at the top of the view. In the example below (the PVT view for data input into the IMEX™ simulator), you can see that there are four tabs at the top of the view: Set Model, Parameters, PVT Table, and Undersaturated Oil Data. Each of these tabs represents a different input table; clicking each tab opens a table with different inputs related to the view.
Aside from the input tables, another common feature of the views is a master table, which appears to the left of the main table when applicable. The master table allows you to organize and define multiple instances of the input table data. In the example below, you can see that there are two entries in the master table: 'PVT1' and 'PVT2' which, in this case, represent different PVT regions. The small black arrow  indicates which row is active; in the example below, the 'PVT1' region is active. Different sets of data can be specified for each row in the master table.
Additionally, some views contain graphs or other representations of your simulation data, as the PVT view does.
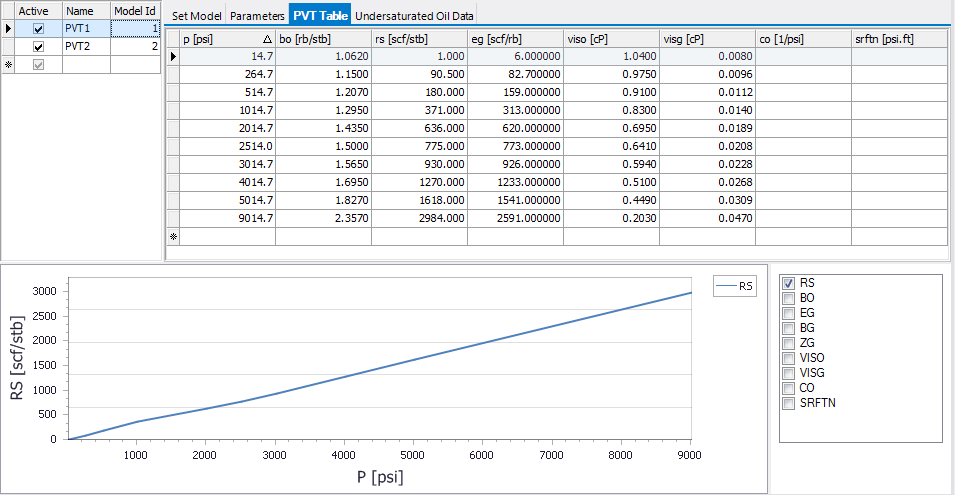
PVT table click to enlarge
As you will be primarily working in the data input tables it is important that you understand the different features and aspects that you may encounter. See Input Tables for details on how the data input tables are used.
Unicode and reservoir simulation
Deck files for each of the simulators supported do not support Unicode characters as Unicode data is not parsed by the simulators. When naming cases, case components, or working in the various data entry tables (such as the PVT view pictured above) Unicode characters are not supported and will cause the simulation to fail.