The prepare strip
Data preparation in JewelSuite Subsurface Modeling involves all data handling steps that follow directly after data import, but are prior to the actual creation of models in the modeling strip. The functionality provided in the prepare strip includes seismic interpretation, marker interpretation, editing and grouping of (imported) surfaces and creating a stratigraphic model.
Preparing surfaces
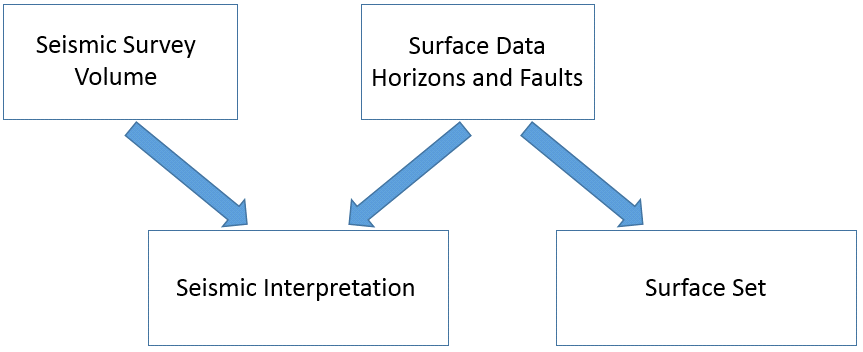
When you do not have seismic data and intend to work with imported surfaces, or when you have interpretations from multiple surveys (with multiple inline/crossline resolutions) that you want to group together into one consistent set, you typically create a Surface Set; else, you create a Seismic Interpretation click to enlarge
Preparing surfaces for modeling is a key step of data preparation. It involves the creation of consistent sets of surfaces by grouping (imported) surfaces into pre-modeling 'buckets'. You fill these 'buckets' by assigning surfaces from the 'Imports' and 'Data' folder in the JewelExplorer to them. Initially all imported surfaces are stored in the Imports folder in the JewelExplorer. All derived ore created surface data are stored in the Data folder. This excludes the surface data that are imported via Connectors (e.g. OpenWorks and Petrel), which are directly assigned to the associated seismic interpretation.
In this 'grouping into buckets' process, there are two workflows you can follow: the Seismic Interpretation workflow (available under the Seismic item of the prepare strip) or the Surface Sets workflow (available under the Surfaces item of the prepare strip).
You typically use the Surface Sets workflow when you do not have seismic data and intend to work with imported surfaces. Also, you would use the Surface Sets workflow when you have interpretations from multiple surveys with multiple inline/crossline resolutions that you want to group together into one consistent set. You typically use the Seismic Interpretation workflow when you have seismic data and any imported surfaces are interpreted based on that same data, ensuring full consistency.
Using the Seismic Interpretation workflow
In most cases the modeling inputs (faults, horizons etc.) are interpretations associated with one or more depth-converted seismic volumes. A guiding modeling principal is to preserve the audit trail between the initial interpretation and the modeling outcome. Data may be assigned directly to the Seismic Interpretation folder (e.g. from the OpenWorks data connector) or may be manually assigned with the Seismic Interpretation workflow. The Seismic Interpretation folder is designed to hold all these inputs and to ensure a consistent starting point to the modeling process. Correct inline/crossline referencing is enforced for data in the Seismic Interpretation folder; any inconsistencies are removed by resampling of the data.
When you use the Seismic Interpretation workflow, in the JewelExplorer a Seismic Interpretation folder will be created within the Seismic Surveys folder. Interpretations in the Seismic Interpretation folder can be created or edited using the editing tools available under the Seismic item of the prepare strip. This encourages you to follow the guiding principal and edit the interpretations rather than the intermediate products of the interpretations (such as tri-meshed surfaces).
Using the Surface Sets workflow
In some cases you may be required to construct a model from data which is not referenced to a seismic volume, for example when you are rebuilding a model from surfaces exported from another model. On assigning the surfaces from either the Imports or the Data folder, a copy is created in the Surface Set folder. Once the required data is assigned, it can be edited. You typically edit your surfaces in a surface set if you want to edit them in relation to other surfaces, e.g. retract or extend to another surface. In case you want to edit a surface that resides in the Imports folder before assigning it to a surface set, it is best practice to first create a duplicate in the Data folder, and edit that surface, ensuring you retrain your original imported surface.
Well correlation
The Wells item on the prepare strip contains the tools required to set up well correlation panels and create, modify or edit markers. Consistency of markers with the surface-well intersections should also be checked during this stage; for this, a Depth Well Matching tool is available in the prepare > Post-Processing Tools strip. Well matching will change the depth position of the surface at the well location to match with the interpreted marker and generate residuals for visual inspection.
Creating the stratigraphic model
Once the Seismic Interpretation or the Surface Set is created, the horizons and/or well markers can be used to create the stratigraphic model. The stratigraphic model defines the stratigraphic hierarchy of these horizons and/or well markers.
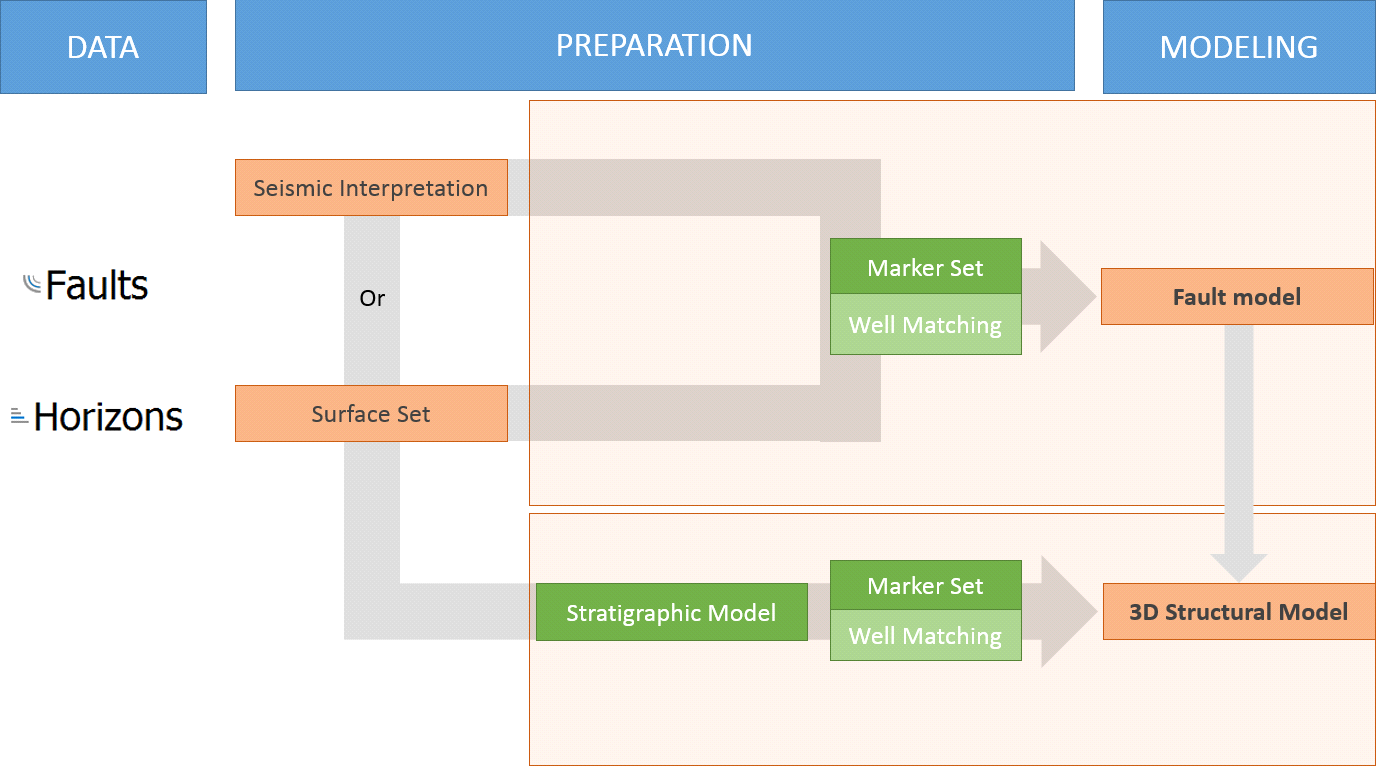
Flow diagram showing the place of the Stratigraphic Model in the full workflow. This diagram is limited to static data but other data (such as fluid contacts, depletion data, interference tests) also provide an input to the stratigraphic correlation click to enlarge